
The passwordless future with passkeys
Passwords are the standard way of securing access to our accounts, but is it really the best way? The answer is: of course it is not. Security, reliability, convenience are some of the aspects that are far from perfect and that is why password managers and 2FA services became almost a necessity, often requiring extra tools. The biggest problem, though, are the users and the adoption of best practices. The average users will always choose convenience like… using the same easy-to-remember password for every service. So is there a better solution providing superior security, while also improving the user experience?
What are passkeys?
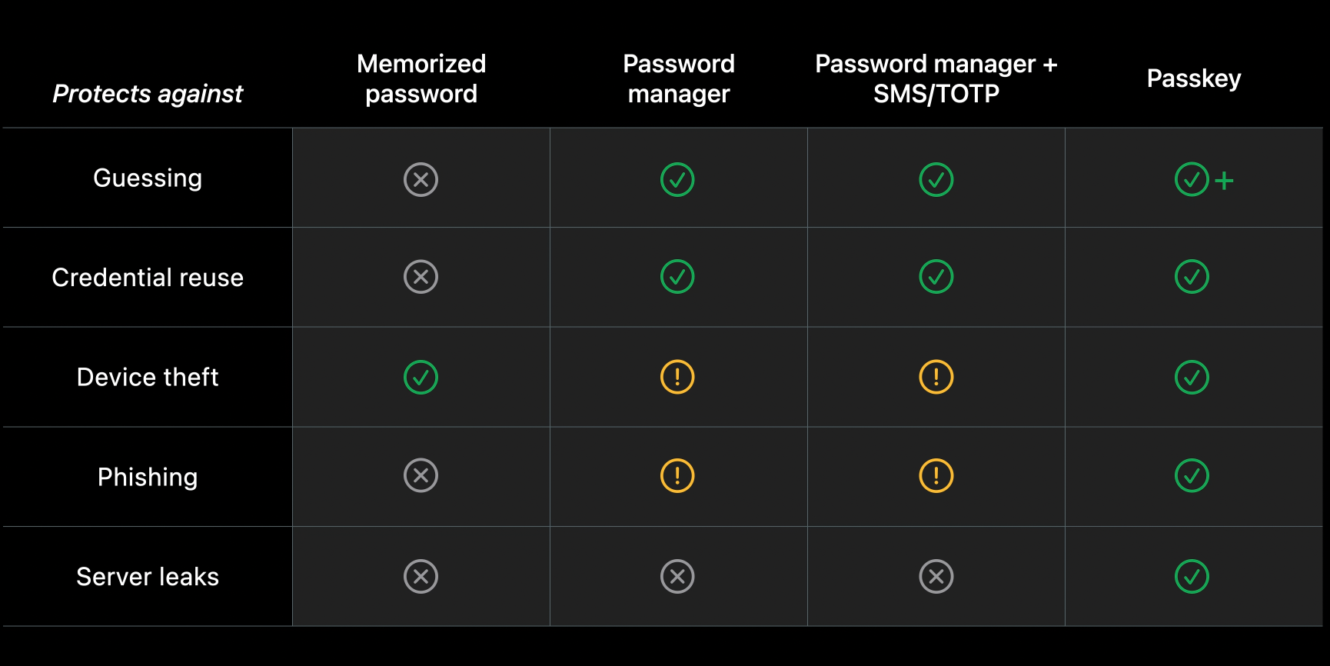
Passkeys refer to the general name for mutli-device WebAuthn/FIDO2 credentials. This term encompasses an authentication method for websites and apps that utilizes a pair of unique, cryptographically strong keys for each service, completely removing the need for passwords The service or app stores the public key, while the authenticator, typically the user’s device or a service like iCloud Keychain, stores the corresponding private key. To access the key the user is prompted to verify ownership by using biometrics, pin, passcode depending on the device that is being used and its capabilities (the biometric information never leaves the device; it is used exclusively to unlock the passkey stored on the device). This approach offers significant security benefits by completely eliminating the possibility of hackers guessing easy and often reused passwords, acquiring them through phishing attacks, or exploiting server leaks. The public key by itself is useless. A great overview of the benefits compared to other solutions was shown at WWDC 2022.
Why are passkeys so much better?
One of the most significant advantages of passkeys, in addition to enhanced security, is the superior user experience. As the average user usually chooses convenience, only a better experience can help transition a big number of users to a more secure solution. Passkeys are supported by the FIDO Alliance, which includes member companies such as Google, Apple, Microsoft, and many others. The three mentioned above, are particularly important, as they are the owners and maintainers of the majority of consumer operating systems. Every one of these operating systems now supports passkeys out of the box (Android 9+, iOS 16+), providing a streamlined, user-friendly system UI that feels familiar to the user. Additionally, passkeys can also be used in browsers like Chrome, Edge, Brave, or Safari (Firefox currently supports passkeys only partially).
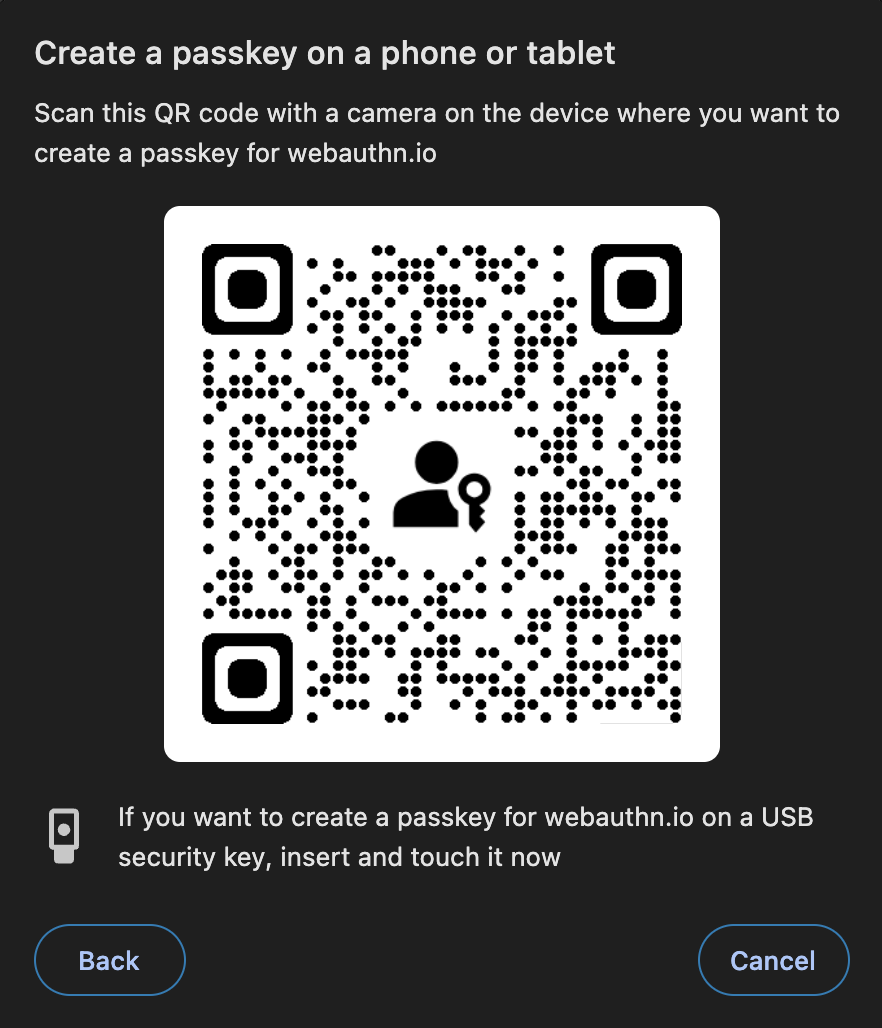
The second significant user experience improvement is Cross-Device Authentication (CDA) – the possibility to use passkeys created on, for example, an iOS device to sign into a service on a laptop. This is possible thanks to the CTAP 2 (Client-to-Authenticator Protocol) protocol, which is implemented by the authenticators and clients, not the relying party. Also here, a streamlined UI is provided by the client side, as, for example, using Chrome – the browser then prompts to choose a way to authenticate, choosing, for instance, the QR-Code option. The mentioned code then appears on the screen, which can be scanned by a device like a phone. Then, a local key agreement is being made without involving the service we want to authenticate against, also providing a strong guarantee of physical proximity – further improving security without the need for extra MFA methods.
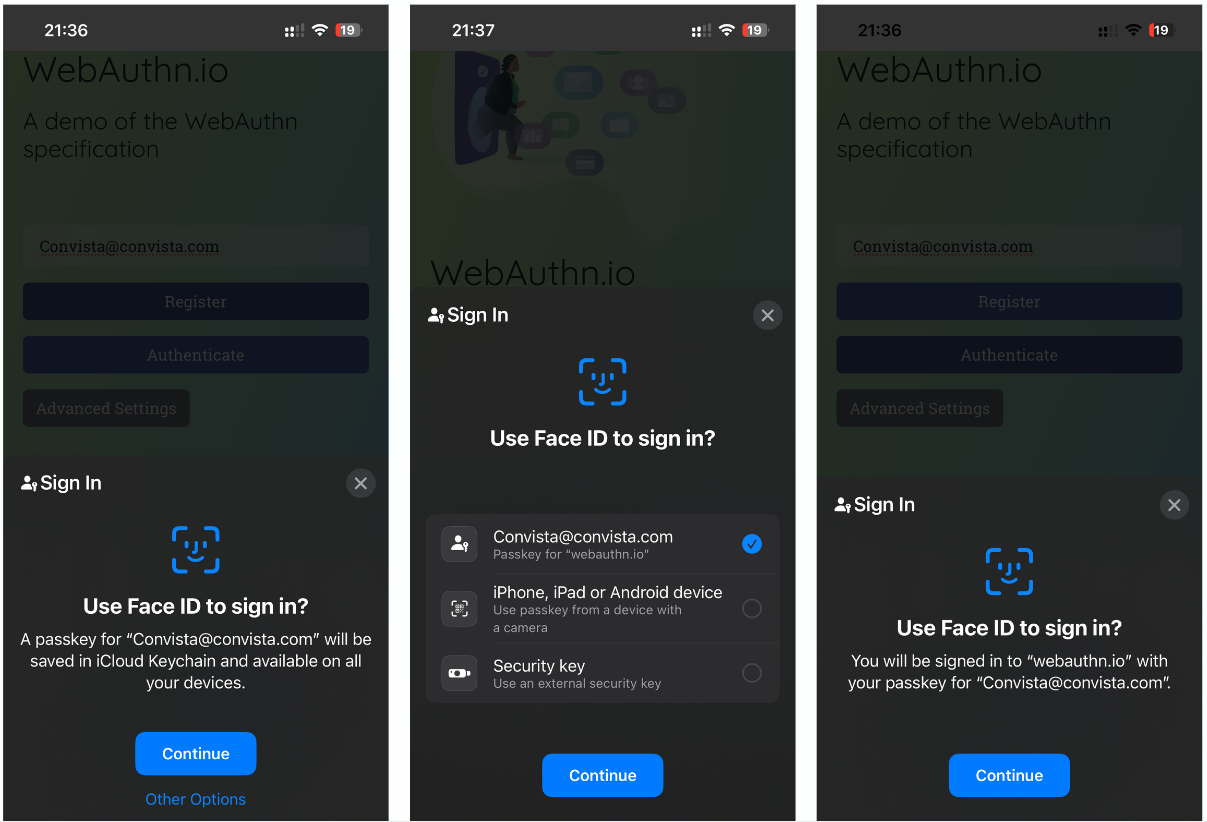
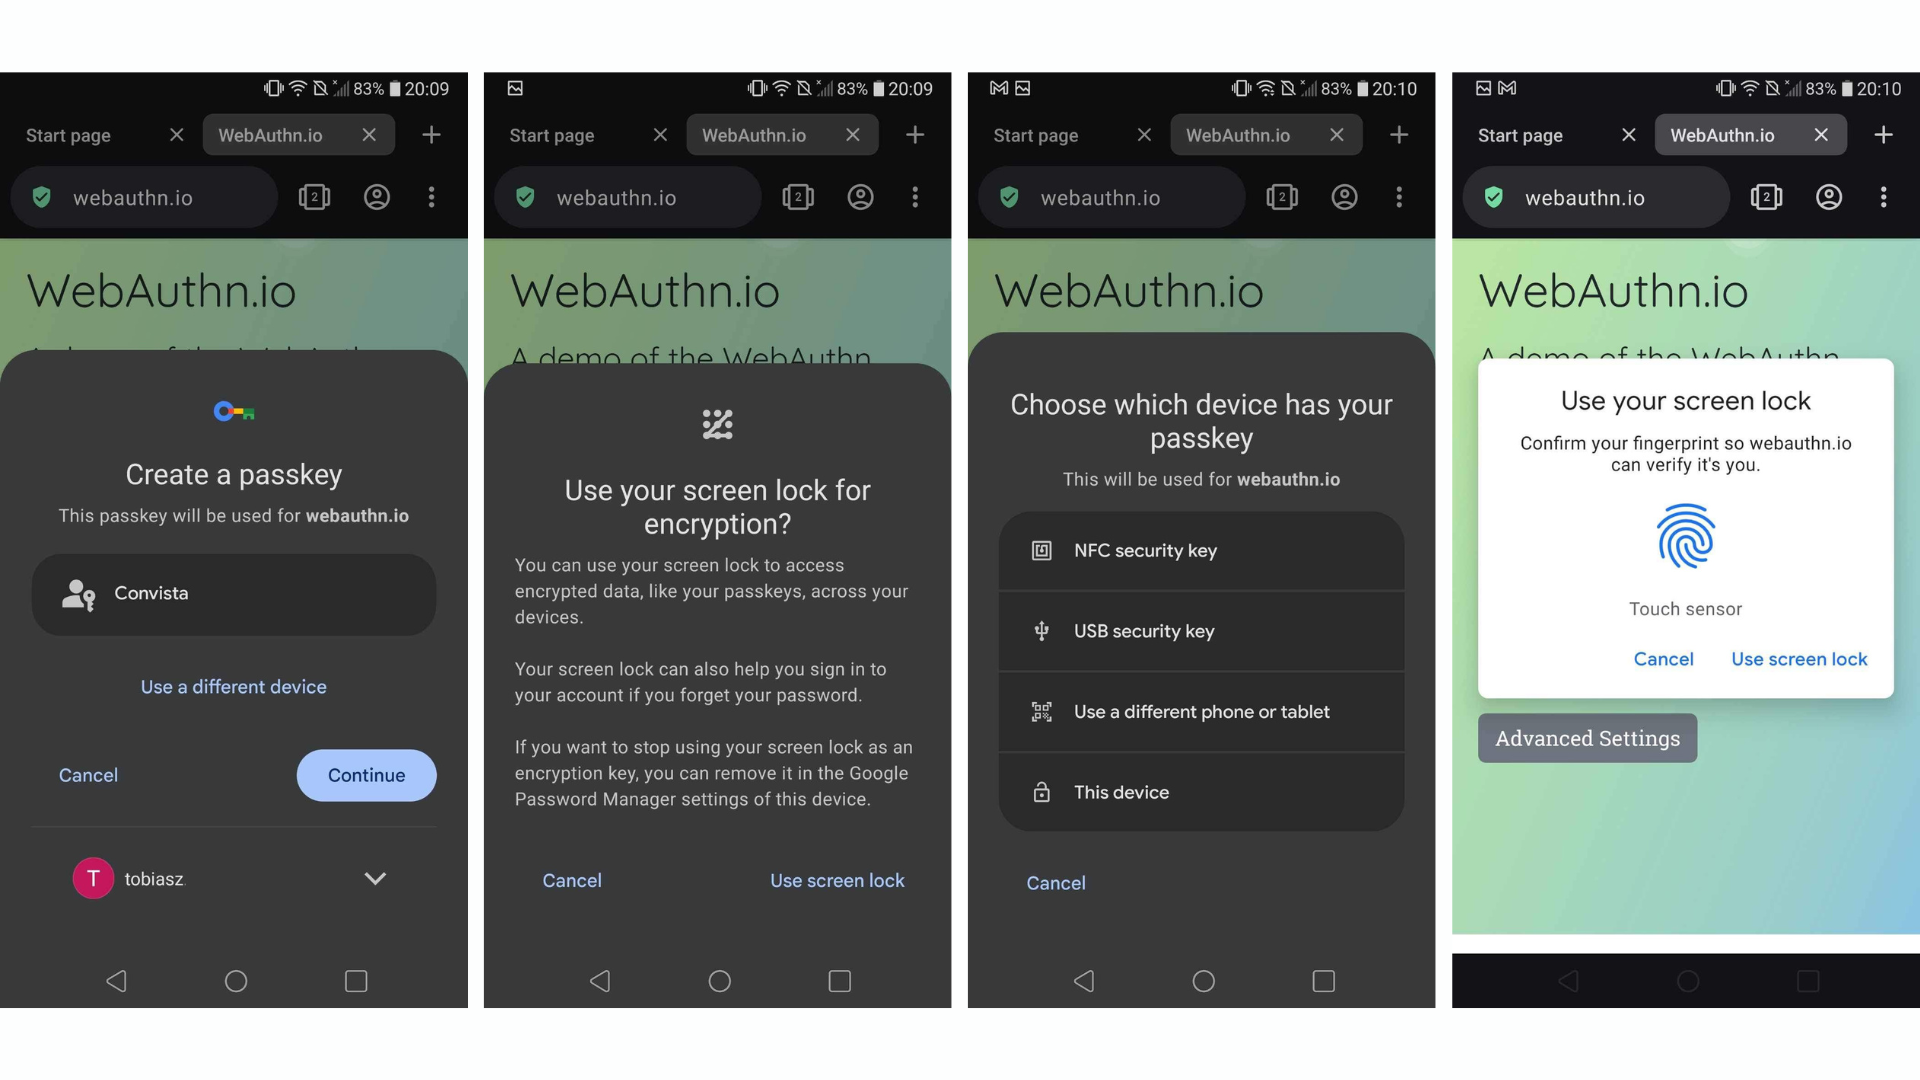
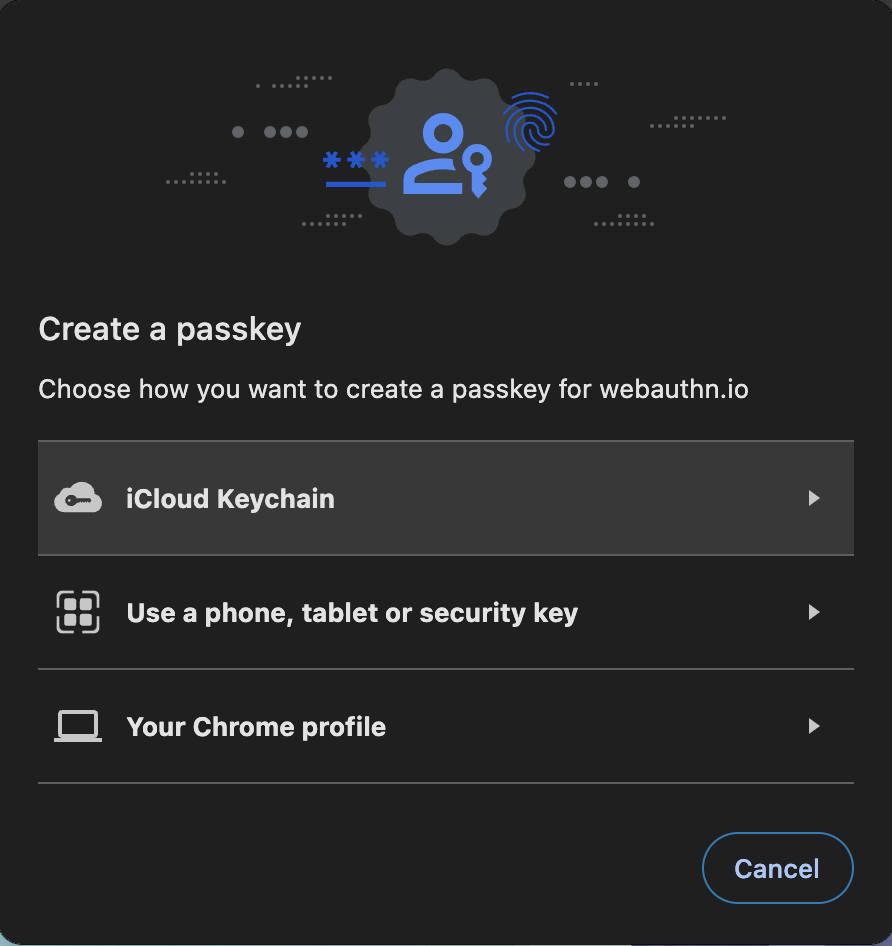
Here are some screenshots:
What about the implementation?
The majority of users usually interact with most services using their mobile devices so let’s focus on them…
Firstly there are couple of perquisites that have to be fulfilled before we can implement passkeys in our Apps:
- A backend supporting the WebAuthn standard
- iOS
- The associated domains entitlement must also be added to the app where the service domain will be defined. For example,webcredentials:convista.pl.
- An apple-app-site-association file with the „webcredentials” key defined. This must be accessible underhttps://<fully qualified domain>/.well-known/apple-app-site-association(the host needs to have a valid SSL certificate without any redirects). It should look something like this:
For more information -> click here
- Android
- Under <application> inn the manifest file we need to add<meta-data android:name="asset_statements" android:resource="@string/asset_statements" />
- Similiar to iOS, we also need to assosiate the app with a website by defining a file accesibile underhttps://domain[:optional_port]/.well-known/assetlinks.json
For more information -> click here
As the implementations are quite similar let’s look at the iOS code.
Looking at the documentation, we can quickly recognize that the Apple solution feels very familiar, if someone has already implemented the login with Apple ID method, as it is also part of the ASAuthorization API family. If we already have a login/registration screen, we ensure the input fields textContentType are set correctly to properly support the AutoFill feature. Then, we import the AuthenticationServices framework and implement the code to perform necessary steps. Let’s look at the following example.
Firstly, we get a challenge from the server, which needs to be unique with every request. Then, we can create the ASAuthorizationPlatformPublicKeyCredentialProvider by passing the domain specified in the associated domains. After that, we can create the actual assertion request, which will be executed if the user chooses the passkey option. Another benefit of using passkeys is that it can be used alongside passwords and other options, so it’s good to allow users to use passwords as a fallback. Then all there is left is to handle the result of the request after the `ASAuthorizationControllerDelegate` methods are called.
Let’s look at happy path:
We check which authorization method was used. From the assertion request, we get the signature and the raw client JSON data, which we then use to verify against the server. If everything is correct, the user is authenticated, and they can now access the app.
To register the user, the process is similar, with the small difference that instead of doing an assertion request, we use a createCredentialRegistrationRequest, just like this:
Where the userID is an identifier to be stored alongside the credential, which will be returned with the credential when it is used to authenticate. That is basically it, the process for android looks very similar, instead of using AuthenticationServices we need to use Credential Manager API – you can read more here.
Summing up
Passkeys seem to be a better alternative to passwords and other methods. Not only do they provide superior security, where user involvement is minimized, but they also benefit the user by being more convenient and coherent with what the user already knows. Are there even drawbacks? As with every solution, the biggest obstacle is adoption. Obviously, time is needed for services to take it upon themselves to implement the necessary support for passkeys. If that happens, and users are presented with an improved version of authentication, there is great hope they will simply use it.
Some companies and services already support passkeys, such as Github, Amazon, Paypal, Cloudflare, Apple, and many more (partially thanks to the solution being backed by the FIDO Alliance). Hopefully, the rest will follow soon.
Useful links
- https://developer.apple.com/documentation/authenticationservices/public-private_key_authentication/supporting_passkeys
- https://developer.android.com/training/sign-in/passkeys
- https://developer.apple.com/videos/play/wwdc2022/10092/
- https://www.youtube.com/watch?v=knrEje81f68
- https://passkeys.dev/
- https://passkeys-auth.com/
- https://webauthn.guide/
- https://webauthn.io/
- https://www.w3.org/TR/webauthn-2/
Join Mobile Team
