
Keycloak
Keycloak is a tool that allows you to manage who can log in to your applications and services from one place. It is open-source, which means it is available for free and modifiable.
Keycloak can be installed in two ways:
- Directly on your computer: Once you have downloaded the relevant files, you need to install Keycloak as a programme.
- Via Docker: If you already have Docker (a popular tool for creating and using virtual containers) installed on your computer, you can run Keycloak on default settings much faster with a simple command.
(https://www.keycloak.org/getting-started/getting-started-docker)
As the Spring Boot application will run on port 8080, above I have changed mapping to port 8081.
The second solution (with Docker) is usually more convenient and less complicated, especially if you are new to Keycloak.
The command, typed into the terminal does several things at once:
It runs a Keycloak 'container' – a small, isolated piece of software with Keycloak running on default settings.
Provides Keycloak at http://localhost:8080.After you have typed this into your browser, the Keycloak homepage will be displayed.
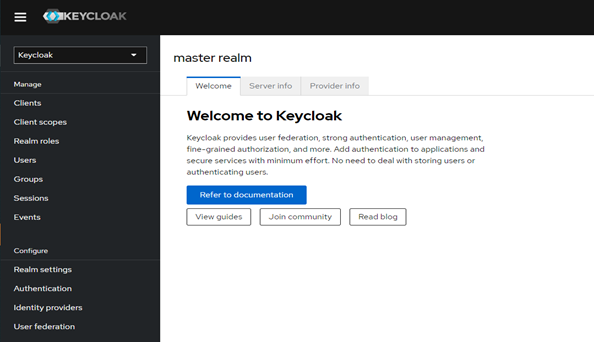
You will access the Keycloak admin panel via http://localhost:8080/admin.
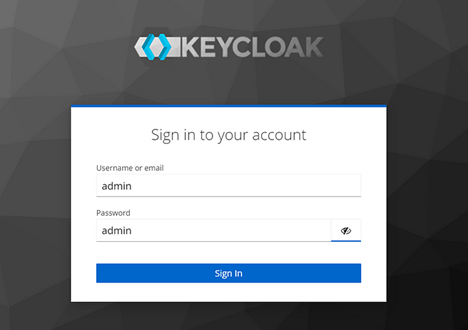
Immediately after installation, when logging into the panel for the first time, both the username and password are “admin”.
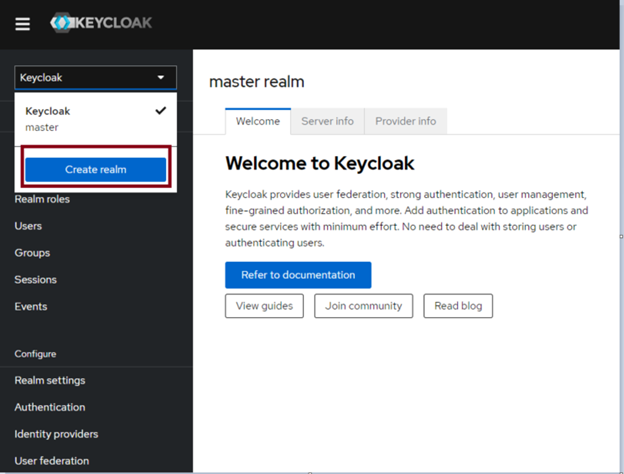
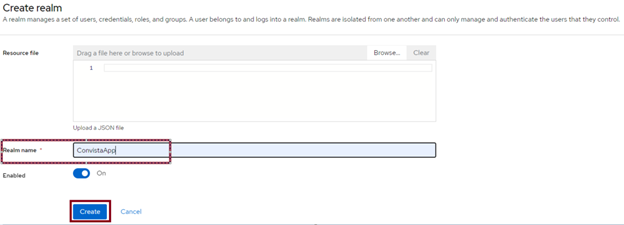
Creating a REALM
A “realm” is a basic organisational unit inKeycloak. Within a single “realm”, you can create users, define roles and permissions that will apply to a specific service or application.
Each realm has its own set of users, access rules, and settings, allowing you to define the users, their roles and how they interact with the applications associated with the realm.
The “realm” named “master” is used exclusively to manage the Keycloak system itself. This is why you need to create your own “realm”.
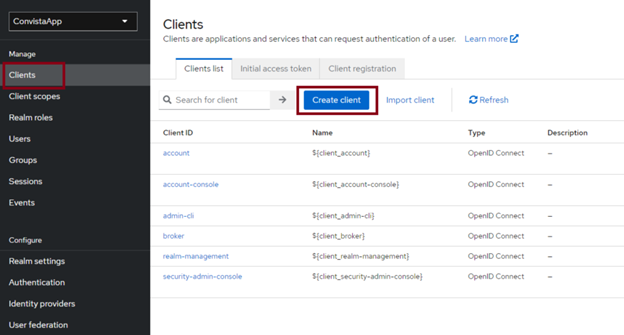
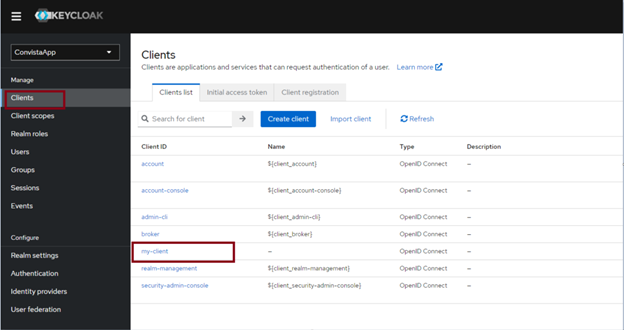
Creating a client
We need to configure a “client” to manage the authentication (i.e. identify verification) of our application's users. In the menu on the left, under “Clients”, select “Create client”.
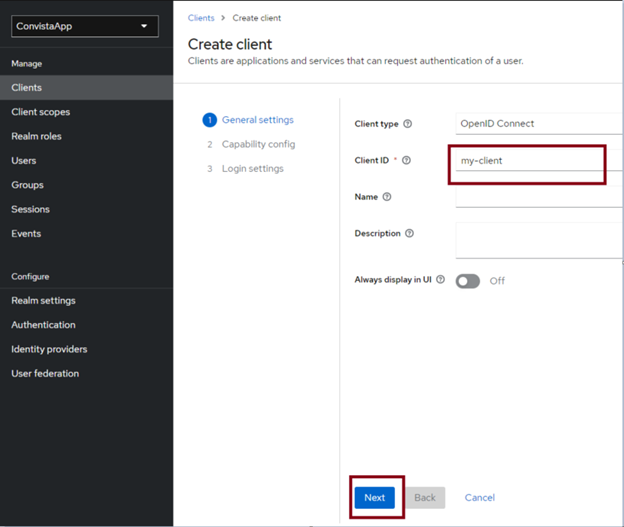
On the next page, just add the Client ID and click next
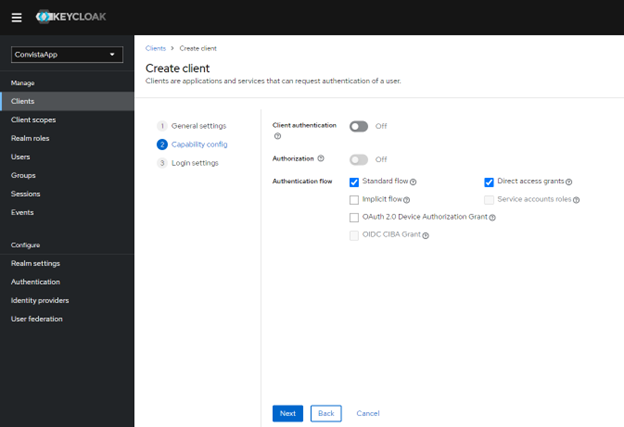
The client's default settings are sufficient, so we can accept them and click NEXT:
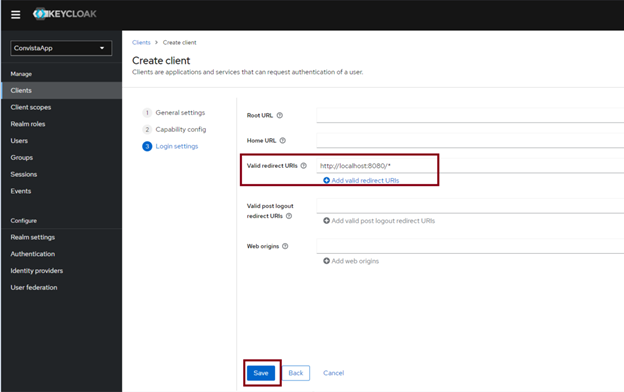
We now need to define “Valid Redirect URIs”. This is the address to which Keycloak will redirect the user after a successful login to our application.
I enter http://localhost:8080/* as the “redirect URIs” and confirm the changes by clicking the “save” button.
Creating roles
Keycloak simplifies the management of permissions in your applications. You can create roles, or sets of permissions, and assign them to users. There are two main types of roles:
Client Role: They relate to a specific application and define what users can do in it. You manage them in the Keycloak administration panel for the respective application.
Realm Role: They define the rights of users in all applications within a given “space” (realm).
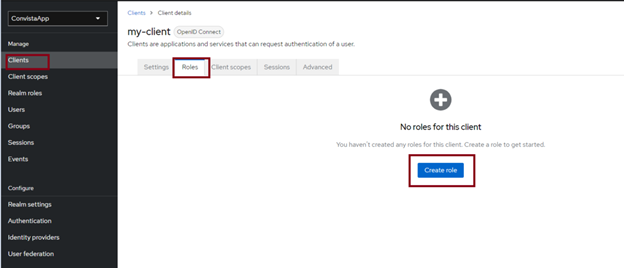
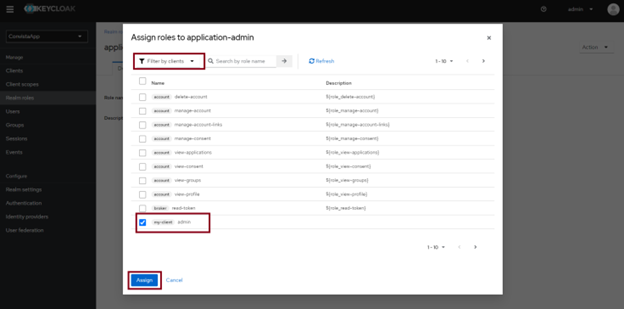
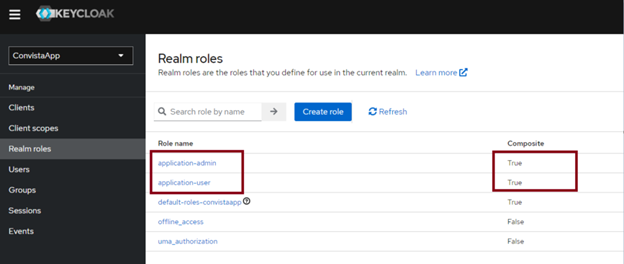
In the application, I need the roles of “user” and “administrator”. In order to create them, I go to the client settings in Keycloak and click “Create roles”.
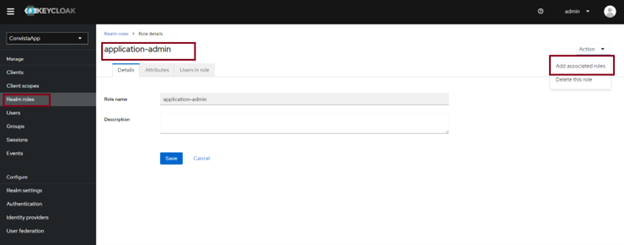
In the next step, we create roles in the Realm roles tab (I created the application-admin and application-user roles):
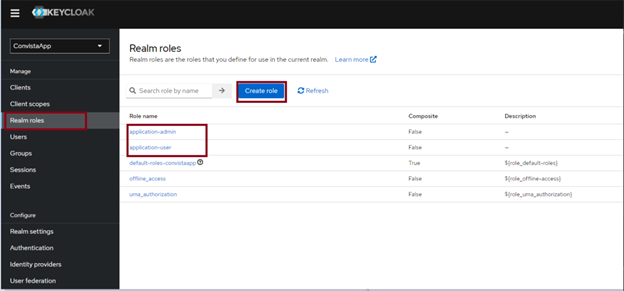
Then, by clicking on one of the Realm roles that have just been created, we can assign them to the previously created user apllication-admin and application-user.
Creating users
The final step is creating users with assigned roles. To do this, go to the Users tab and click on Createn ew user

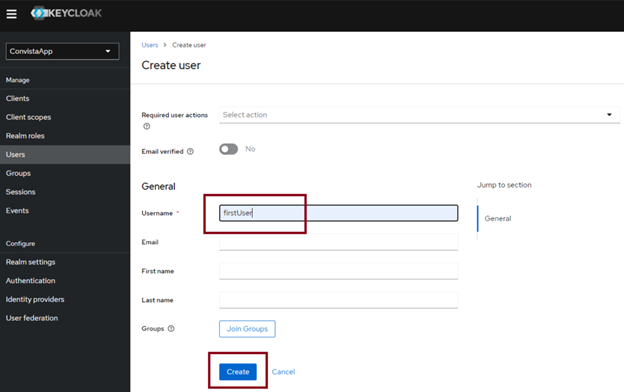
Repeat this step for each user you wish to create
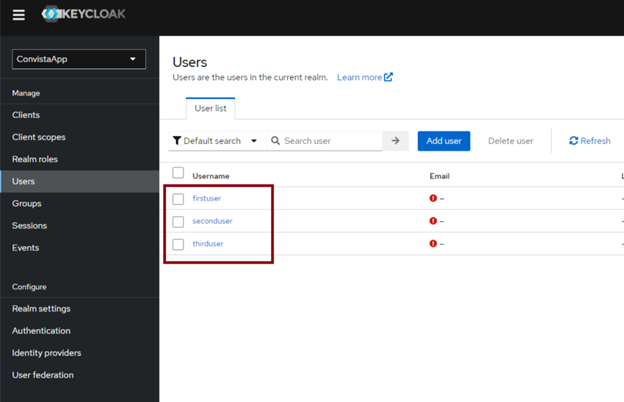
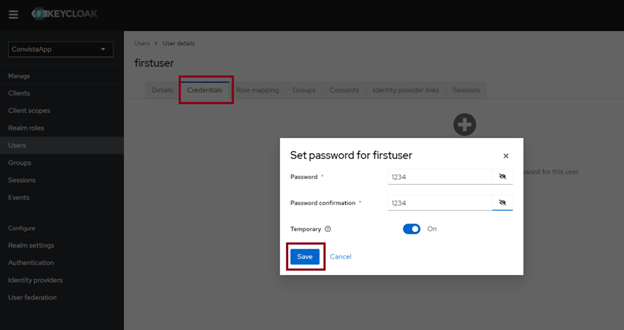
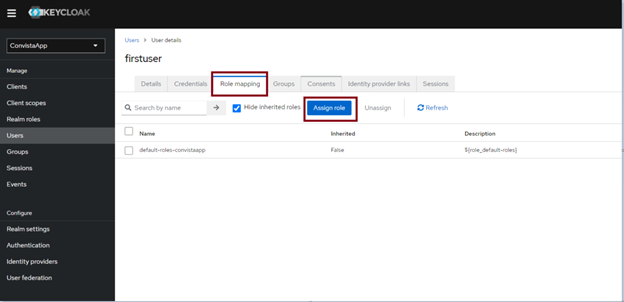
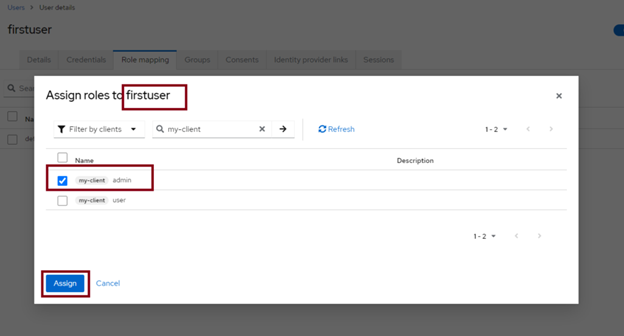
Once the users have been created, we sett he password and map the roles to our users, following the below example:
- user one: firstUser with the role admin
- user two: secondUser with the user role
- user three: thirdUser with both user and admin roles
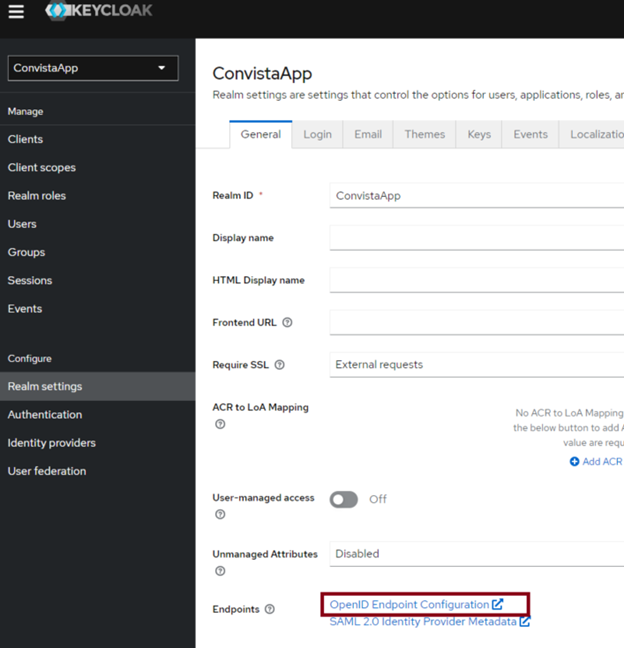
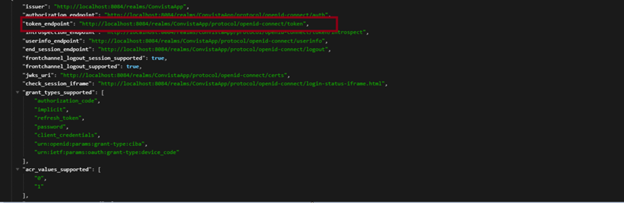
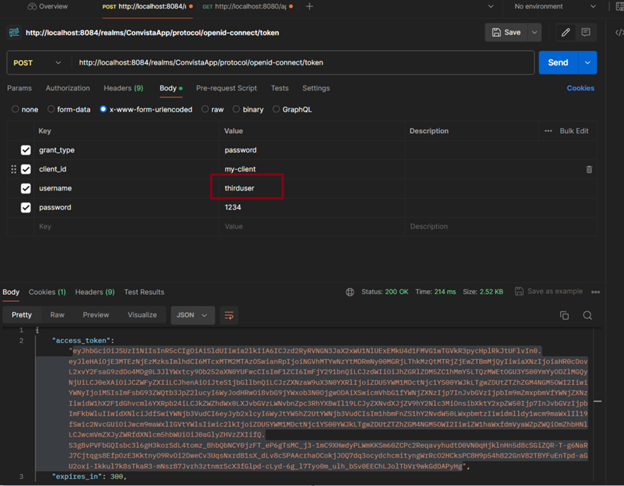
Now we can obtain the token. Go to the link highlighted in the image below:
Next, a page similar to this one will open:
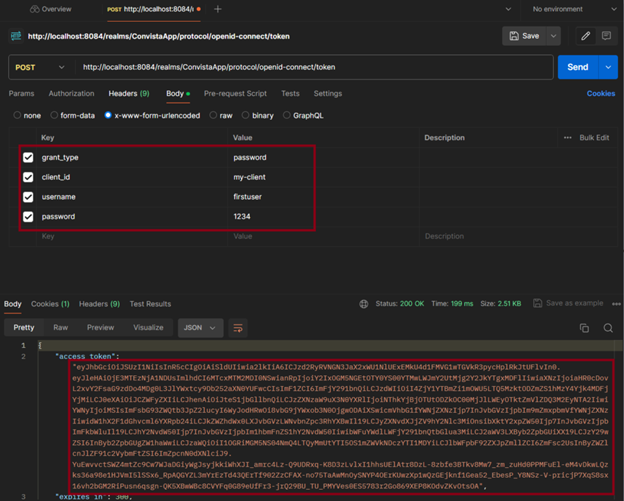
Copy the highlighted link and, using Postman, fill in the details as below and obtain the token:
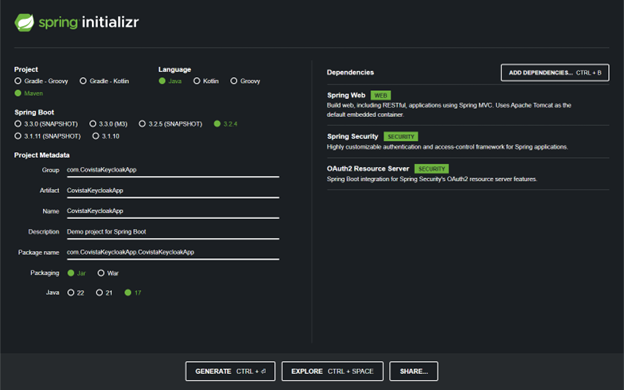
You can now proceed to creating the application in Spring Boot either by using the wizard at spring.start.io or by using the wizard in Intellij IDEA. We will need dependencies as in the screenshot below:
A brief explanation of the above settings:
- spring.security.oauth2.resourceserver.jwt.issuer-uri:
Location of the token “issuer”. The origin of the authentication token – in this case it is your Keycloak realm.
- spring.security.oauth2.resourceserver.jwt.jwk-set-uri:
Address with public keys. These keys are used to verify signatures on tokens – that is, to verify the authenticity of the JWT token.
- jwt.auth.converter.resource-id:
The ID of your application (client). SpringSecurity needs to know that the token has been issued specifically for this particular client.
- jwt.auth.converter.principal-attribute:
Indicate where to find the username. This setting tells you under which name the information about who has logged in is stored in the token (e.g. 'principal_username').
The next step is creating classes that convert and decrypt the JWT tokens sent by Keycloak
The first of these will be a class; let'scall it JwtConversion. It is responsible for correctly understanding JWT tokens in integration with Keycloak. This class stores fields such as the application identifier in Keycloak (resourceId ) and (the name of the attribute under which the user's name is stored (principalAttribute). These settings are needed b ySpring Security to correctly decrypt and interpret the information contained in the tokens sent by Keycloak.
We then create the JwtConverter class. This is the “decoder” in Spring Security. It can decrypt messages (JWT tokens) from Keycloak, and this allows it to check two important aspects:
What permissions the logged-in user has(what roles they have been assigned) and details of the user themselves.
JwtConverter uses the Converter interface, which means that it has a specific “instruction manual” for extracting the required data from the tokens.
The earlier JwtConversion class enables its configuration. Responsible for access control and decryption of JWT tokens.
The last class is the SecurityConfig class
The main tasks of this class:
Defines who has access to which resources(endpoints) of the application.
Session shutdown: Disables the creation of classic sessions on the server, as authentication is done via JWT tokens.
Enabling resource protection via OAuth2using JWT tokens issued by Keycloak (JwtConverter configuration).
authorizeHttpRequests: Block responsible for defining access rules.
- /api/hello – publicly accessible endpoint.
- /api/admin/** – requires the “admin” role.
- /api/user/** – requires the “user” role.
- /api/admin-and-user/** – the “user” OR “admin” role is sufficient.
- anyRequest().authenticated() – all other endpoints require any authentication.
- sessionManagement: Switching off classic session management in favour of tokens.
oauth2ResourceServer: enables the OAuth2resource server mechanism.
jwt ->jwt.jwtAuthenticationConverter(jwtConverter): Sets the use of the jwtConverterto checking JWT tokens.
This class is responsible for the overallsecurity configuration, defining access rules and how to handle JWT tokens from Keycloak.
I will now create a simple Controllerclass:
Now, using the user secondUser, which hasthe role USER only, I will try to access http://localhost:8080/api/admin/user. Only users with the user and admin roles have access to this endpoint. For thispurpose I am downloading the token

I then pose as Bearer token:
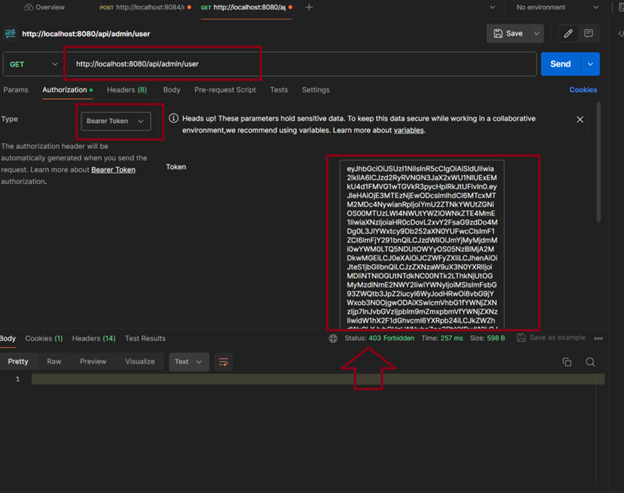
I am viewed a 403 because the user does not have the permissions necessary to access this Endpoint.
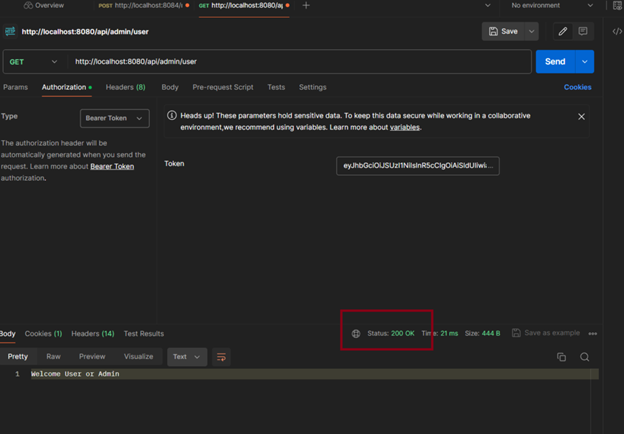
However, when we log in as a third user who has user and admin rights:
Step by step, our work went like this:
We started the Keycloak server using Docker. This is a convenient way to set up such a server quickly.
We understood the basics of Keycloak: We explained the idea of “realms” (spaces), “clients” (applications) and the system of roles through which the user rights can be managed.
We created users and assigned them roles in Keycloak.
We wrote a RESTful application in Spring Boot and integrated it into our Keycloak server. From then on, the application started using tokens issued by Keycloak.
We have secured selected access points(endpoints) of our application. We have made it possible to access certain resources only on presentation of a valid token and if the user has the appropriate rights.
Join Java Team

Isn't it great?